# Security
# GPG / PGP
# Creating ECC keys
Invoke gpg frontend with --expert and --full-gen-key option.
gpg2 --expert --full-gen-key
Then, we input 9 to select ECC primary key and ECC encryption subkey.
Please select what kind of key you want:
   (1) RSA and RSA (default)
   (2) DSA and Elgamal
   (3) DSA (sign only)
   (4) RSA (sign only)
   (7) DSA (set your own capabilities)
   (8) RSA (set your own capabilities)
   (9) ECC and ECC
  (10) ECC (sign only)
  (11) ECC (set your own capabilities)
Your selection? 9
2
3
4
5
6
7
8
9
10
11
Next is the important selection. We input 1 to select Curve25519.
Please select which elliptic curve you want:
   (1) Curve 25519
   (2) NIST P-256
   (3) NIST P-384
   (4) NIST P-521
   (5) Brainpool P-256
   (6) Brainpool P-384
   (7) Brainpool P-512
   (8) secp256k1
Your selection? 1
2
3
4
5
6
7
8
9
10
For the expiration time it's a best practise to use 1 year and to renew it each year. This way, in case you lose or someone steals your private key, the key could not be valid after a maximum of 1 year.
Type 1y
Please specify how long the key should be valid.
         0 = key does not expire
      <n>  = key expires in n days
      <n>w = key expires in n weeks
      <n>m = key expires in n months
      <n>y = key expires in n years
Key is valid for? 1y
Is this correct? (y/N) y
2
3
4
5
6
7
8
# List keys
gpg --list-keys

/home/baptiste/.gnupg/pubring.kbx
---------------------------------
pub   ed25519 2020-05-07 [SC] [expires: 2021-05-07]
      5A040187EDDDD936B41E8268E4577920E02746B3
uid           [ultimate] Baptiste Dauphin <baptistedauphin76@gmail.com>
sub   cv25519 2020-05-07 [E] [expires: 2021-05-07]
2
3
4
5
6
7
8
note : my key digest is 5A040187EDDDD936B41E8268E4577920E02746B3
# Export public key
gpg --armor --export 5A040187EDDDD936B41E8268E4577920E02746B3

-----BEGIN PGP PUBLIC KEY BLOCK-----

************************************
************************************
************************************
************************************
************************************
************************************
-----END PGP PUBLIC KEY BLOCK-----
2
3
4
5
6
7
8
9
10
11
# Export private key
gpg --export-secret-keys --armor 5A040187EDDDD936B41E8268E4577920E02746B3

-----BEGIN PGP PRIVATE KEY BLOCK-----

************************************
************************************
************************************
************************************
************************************
************************************
-----END PGP PRIVATE KEY BLOCK-----
2
3
4
5
6
7
8
9
10
11
# Extract private key and import on different machine
gpg2 --export-secret-keys --armor 5A040187EDDDD936B41E8268E4577920E02746B3 > private.key
Copy on the desired location
gpg2 --import private.key
Sources :
# Photo
# Display gpg key photo
gpg2 --list-options show-photos --fingerprint 5A040187EDDDD936B41E8268E4577920E02746B3
gpg2 --list-options show-photos --fingerprint 5A040187EDDDD936B41E8268E4577920E02746B3 --photo-viewer 'eog %I'
2
# Renew expired key
Given that your key has expired.
gpg --list-keys
gpg --edit-key KEYID
2
Use the expire command to set a new expire date:
gpg> expire
When prompted type 1y or however long you want the key to last for.
gpg> 1y
gpg> trust
gpg> save
2
3
And then upload it to your github / gitlab or remote server after having exported it !
gpg --armor --export KEYID

-----BEGIN PGP PUBLIC KEY BLOCK-----
2
3
4
# Vault
Secret management
File-policy -> Policy -> Token
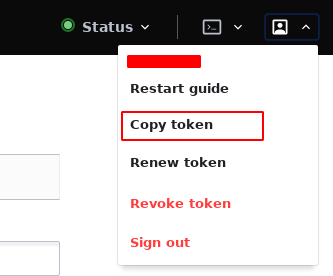
# Login token
with your personal token. You can generate it from the web ui
vault login
Token (will be hidden):
Success! You are now authenticated. The token information displayed below
2
3
Verify your token
vault token lookup
# Login LDAP
vault login -method=ldap username=$USER
Both Will set up a token under ~/.vault-token
# Get
vault kv get path/to/secret
# Policy
List all enabled policies:
vault policy list
Create or refresh a policy named "my-policy" from contents
vault policy write my-policy ./my-policy.hcl
Delete the policy named my-policy
vault policy delete my-policy
### Token Token can be viewed as a policy accessor
vault token create -policy=my-api-policy-developement -renewable -period=768h

vault token create -policy=my-api-policy-staging -renewable -period=768h

vault token create -policy=my-api-policy-production -renewable -period=768h
2
3
4
5
6
# OpenSSL
# Definitions
| Keywork | meaning |
|---|---|
| SSL | |
| TLS | |
| Private key | |
| Public key | |
| RSA | |
| ECDSA |
# Get info about a certificate
| Option | Description |
|---|---|
-text | Prints out the certificate in text form. |
-noout | Prevents output of the encoded version of the request. |
-subject | Outputs the subject name. |
-issuer | Outputs the issuer name. |
-dates | Prints out the start and expiry dates of a certificate. |
-fingerprint | prints out the digest of the DER encoded version of the whole certificate. |
openssl s_client -servername example.org -connect example.org:443    < /dev/null | openssl x509 -text

openssl s_client -servername example.org -connect example.org:443    < /dev/null | openssl x509 -noout -fingerprint

openssl s_client -servername example.org -connect example.org:443    < /dev/null | openssl x509 -noout -fingerprint -dates

openssl s_client -servername example.org -connect example.org:443    < /dev/null | openssl x509 -text -noout -dates

echo | openssl s_client -servername example.org -connect example.org:443  2>/dev/null | openssl x509 -noout -dates

echo | openssl s_client -servername example.org -connect example.org:443 2>/dev/null | openssl x509 -noout -issuer -subject -dates
2
3
4
5
6
7
8
9
10
11
2>/dev/null: Redirect stderr to/dev/null, (just to deal with the strange behaviour ofopensslcommand.)< /dev/null: plug the output of/dev/nullto stdin ofopensslbecause this cmd requires you an stdin, so we set it to/dev/null(just to deal with the strange behaviour ofopensslcommand.)echo |: Same behaviour as previous (< /dev/null) but it's just another method to do it with bash.
# Get info from network
Using s_client arg
echo | openssl s_client -servername example.org -connect example.org:443 2>/dev/null
# Get from file
Using x509 arg
openssl x509 --in /etc/ssl/certs/ca_server.pem
openssl x509 --in /etc/ssl/certs/ca_server.pem | openssl x509 --text
openssl x509 --in /etc/ssl/certs/ca_server.pem | openssl x509 --text --noout --dates
2
3
debian 7, openssl style
openssl x509 -in /etc/ssl/private/sub.domain.tld.pem
# Get OCSP Status
Use the flag -status, it should respond successful obviously. If not, you have to fix your nginx config.
openssl s_client -servername share.baptiste-dauphin.com.com -connect share.baptiste-dauphin.com:443 -status < /dev/null | grep -i 'OCSP Response'
OCSP enabled
OCSP response:
OCSP Response Data:
    OCSP Response Status: successful (0x0)
    Response Type: Basic OCSP Response
2
3
4
OCSP diabled
OCSP response: no response sent
# Force cipher
# RSA or EC ?
-cipher ECDHE-RSA-AES128-GCM-SHA256
-cipher ECDHE-ECDSA-AES128-GCM-SHA256
2
echo | openssl s_client \
-servername google.com \
-connect google.com:443 \
-cipher ECDHE-RSA-AES128-GCM-SHA256 \
2>/dev/null | \
openssl x509 -text | \
grep "Public Key Algorithm"


echo | \
openssl s_client \
-servername google.com \
-connect google.com:443 \
-cipher ECDHE-ECDSA-AES128-GCM-SHA256 \
2>/dev/null | \
openssl x509 -text | \
grep "Public Key Algorithm"
2
3
4
5
6
7
8
9
10
11
12
13
14
15
16
17
# Test full chain
OpenSSL verify with -CAfile
openssl verify ./dev.bdauphin.io.pem
CN = dev.bdauphin.io.pem
error 20 at 0 depth lookup: unable to get local issuer certificate
error ./dev.bdauphin.io: verification failed

openssl verify -CAfile ./bdauphin.io_intermediate_certificate.pem ./dev.bdauphin.io.pem
./dev.bdauphin.io: OK
2
3
4
5
6
7
# Get SAN
Subject Alternative Name AKA DNS
# Common usage
Test certificate validation + right adresses
for certif in * ; do openssl verify -CAfile ../baptiste-dauphin.io_intermediate_certificate.pem $certif ; done
dev.baptiste-dauphin.io.pem: OK
plive.baptiste-dauphin.io.pem: OK
www.baptiste-dauphin.io.pem: OK

for certif in * ; do openssl x509 -in $certif -noout -text | egrep '(Subject|DNS):' ; done
        Subject: CN = dev.baptiste-dauphin.com
                DNS:dev.baptiste-dauphin.com, DNS:dav-dev.baptiste-dauphin.com, DNS:provisionning-dev.baptiste-dauphin.com, DNS:share-dev.baptiste-dauphin.com
        Subject: CN = plive.baptiste-dauphin.com
                DNS:plive.baptiste-dauphin.com, DNS:dav-plive.baptiste-dauphin.com, DNS:provisionning-plive.baptiste-dauphin.com, DNS:share-plive.baptiste-dauphin.com
        Subject: CN = www.baptiste-dauphin.com
                DNS:www.baptiste-dauphin.com, DNS:dav.baptiste-dauphin.com, DNS:provisionning.baptiste-dauphin.com, DNS:share.baptiste-dauphin.com
2
3
4
5
6
7
8
9
10
11
12
# Converting PEM to PKCS12
(using intermediate certificate)
cat certificate.crt intermediate.crt > bundle.crt
openssl pkcs12 -export -out certificate.pfx -inkey privateKey.key -in bundle.crt


openssl pkcs12 \
-export \
-in cert.pem \
-inkey key.key \
-certfile ca.pem \
-out cert.pfx
2
3
4
5
6
7
8
9
10
# get system CA
ls -l /usr/local/share/ca-certificates
ls -l /etc/ssl/certs/
2
# refresh system CA after changing files in the folder
sudo update-ca-certificates
# CSR / Private key
Generate Certificate Signing Request (csr) + the associate private key Will generates both private key and csr token
# RSA style
Considered as maybe deprecated
openssl req -nodes -newkey rsa:4096 -sha256 -keyout $(SUB.MYDOMAIN.TLD).key -out $(SUB.MYDOMAIN.TLD).csr -subj "/C=FR/ST=France/L=PARIS/O=My Company/CN=$(SUB.MYDOMAIN.TLD)"
# Elliptic Curve (ECDSA)
much more secure
# generate private key
openssl ecparam -out $(SUB.MYDOMAIN.TLD).key -name sect571r1 -genkey
# generate csr
openssl req -new -sha256 -key $(SUB.MYDOMAIN.TLD).key -nodes -out $(SUB.MYDOMAIN.TLD).csr -subj "/C=FR/ST=France/L=PARIS/O=My Company/CN=$(SUB.MYDOMAIN.TLD)"
2
3
4
You can verify the content of your csr token here : DigiCert Toolopen in new window
# Encrypt manually
echo '<190>Apr 20 17:21:03 ostoto plop2[5847695]: {"plop2":"miaou"}' | \
openssl s_client -showcerts -connect 10.10.10.10:514
2
# Chose a sage curves for elliptic-curve cryptography
https://safecurves.cr.yp.to/
# AIA (Authority Information Access)
L'extension Authority Information Access (AIA) permet aux clients SSL/TLS (le plus souvent des navigateurs web) d'aller rechercher des certificats intermédiaires manquants, non-présentés par le serveur.
Il est utile de préciser que les serveurs qui n'envoient pas la chaine complète sont en infraction vis à vis de la norme SSL/TLS.
Cette extension, qui place dans le certificat final un "CA Issuer" contenant une URL, permet au navigateur d'aller chercher le certificat manquant, puis de retenter la vérification de la chaine avec.
You can try by yourself, I setup specific endpoints 😉
- https://full-chain.baptiste-dauphin.com/
- https://no-full-chain.baptiste-dauphin.com/
curl https://full-chain.baptiste-dauphin.com

<!DOCTYPE html>
<html>
<head>
<title>Welcome to nginx!</title>
<style>
    body {
        width: 35em;
        margin: 0 auto;
        font-family: Tahoma, Verdana, Arial, sans-serif;
    }
</style>
</head>
<body>
<h1>Welcome to nginx!</h1>
<p>If you see this page, the nginx web server is successfully installed and
working. Further configuration is required.</p>

<p>For online documentation and support please refer to
<a href="http://nginx.org/">nginx.org</a>.<br/>
Commercial support is available at
<a href="http://nginx.com/">nginx.com</a>.</p>

<p><em>Thank you for using nginx.</em></p>
</body>
</html>
2
3
4
5
6
7
8
9
10
11
12
13
14
15
16
17
18
19
20
21
22
23
24
25
26
27
curl https://no-full-chain.baptiste-dauphin.com
curl: (60) SSL certificate problem: unable to get local issuer certificate
More details here: https://curl.haxx.se/docs/sslcerts.html

curl performs SSL certificate verification by default, using a "bundle"
 of Certificate Authority (CA) public keys (CA certs). If the default
 bundle file isn't adequate, you can specify an alternate file
 using the --cacert option.
If this HTTPS server uses a certificate signed by a CA represented in
 the bundle, the certificate verification probably failed due to a
 problem with the certificate (it might be expired, or the name might
 not match the domain name in the URL).
If you'd like to turn off curl's verification of the certificate, use
 the -k (or --insecure) option.
2
3
4
5
6
7
8
9
10
11
12
13
14
15
# Let's encrypt Certbot
Generate a wildcard certificate
# Install Certbot
apt-get install certbot python-certbot-nginx
# Install correct DNS plugin
sudo apt-get install python3-certbot-dns-ovh
# Set up credentials
To be able to request a wildcard certificate against let's encrypt api, you need to have access to your dns-provider api.
For example : I want to secure all of my existing + futures subdomain. *.baptiste-dauphin.com
So first step : Get your dns-provider, credentials. In my case (ovh) I need
- application_key
- application_secret
- consumer_key
Follow my dns-provider tutorial and get your keys and feed ./certbot.ini.
For other dns-provider see the official certbot doc open in new window
# Request your cert against let's encrypt
certbot certonly \
  --dns-ovh \
  --dns-ovh-credentials ./certbot.ini \
  -d \*.baptiste-dauphin.com
2
3
4
Saving debug log to /var/log/letsencrypt/letsencrypt.log
Plugins selected: Authenticator dns-ovh, Installer None
Obtaining a new certificate
Performing the following challenges:
dns-01 challenge for baptiste-dauphin.com
Waiting 30 seconds for DNS changes to propagate
Waiting for verification...
Cleaning up challenges

IMPORTANT NOTES:
 - Congratulations! Your certificate and chain have been saved at:
   /etc/letsencrypt/live/baptiste-dauphin.com/fullchain.pem
   Your key file has been saved at:
   /etc/letsencrypt/live/baptiste-dauphin.com/privkey.pem
   Your cert will expire on 2020-12-29. To obtain a new or tweaked
   version of this certificate in the future, simply run certbot
   again. To non-interactively renew *all* of your certificates, run
   "certbot renew"
 - If you like Certbot, please consider supporting our work by:

   Donating to ISRG / Let's Encrypt:   https://letsencrypt.org/donate
   Donating to EFF:                    https://eff.org/donate-le
2
3
4
5
6
7
8
9
10
11
12
13
14
15
16
17
18
19
20
21
22
# Edit your nginx vhost
...
    ssl_certificate     /etc/letsencrypt/live/baptiste-dauphin.com/fullchain.pem;
    ssl_certificate_key /etc/letsencrypt/live/baptiste-dauphin.com/privkey.pem;
...
2
3
4
# Confirm that Certbot worked
echo | openssl s_client \
-servername share.baptiste-dauphin.com \
-connect share.baptiste-dauphin.com:443 2>/dev/null \
| openssl x509 -noout -issuer -subject
2
3
4
issuer=C = US, O = Let's Encrypt, CN = Let's Encrypt Authority X3
subject=CN = *.baptiste-dauphin.com
2
# Renewal
Setup automatic renewal
The Certbot packages on your system come with a cron job or systemd timer that will renew your certificates automatically before they expire. You will not need to run Certbot again, unless you change your configuration. You can test automatic renewal for your certificates by running this command:
certbot renew --dry-run
Saving debug log to /var/log/letsencrypt/letsencrypt.log

- - - - - - - - - - - - - - - - - - - - - - - - - - - - - - - - - - - - - - - -
Processing /etc/letsencrypt/renewal/baptiste-dauphin.com.conf
- - - - - - - - - - - - - - - - - - - - - - - - - - - - - - - - - - - - - - - -
Cert not due for renewal, but simulating renewal for dry run
Plugins selected: Authenticator dns-ovh, Installer None
Renewing an existing certificate
Performing the following challenges:
dns-01 challenge for baptiste-dauphin.com
Waiting 30 seconds for DNS changes to propagate
Waiting for verification...
Cleaning up challenges

- - - - - - - - - - - - - - - - - - - - - - - - - - - - - - - - - - - - - - - -
new certificate deployed without reload, fullchain is
/etc/letsencrypt/live/baptiste-dauphin.com/fullchain.pem
- - - - - - - - - - - - - - - - - - - - - - - - - - - - - - - - - - - - - - - -

- - - - - - - - - - - - - - - - - - - - - - - - - - - - - - - - - - - - - - - -
** DRY RUN: simulating 'certbot renew' close to cert expiry
**          (The test certificates below have not been saved.)

Congratulations, all renewals succeeded. The following certs have been renewed:
  /etc/letsencrypt/live/baptiste-dauphin.com/fullchain.pem (success)
** DRY RUN: simulating 'certbot renew' close to cert expiry
**          (The test certificates above have not been saved.)
- - - - - - - - - - - - - - - - - - - - - - - - - - - - - - - - - - - - - - - -
2
3
4
5
6
7
8
9
10
11
12
13
14
15
16
17
18
19
20
21
22
23
24
25
26
27
28
The command to renew certbot is installed in one of the following locations:
ls -l /etc/crontab/
ls -l /etc/cron.*/*
systemctl list-timers
2
3
Official docopen in new window
# Config file
cert, private key, chain, full chain, LE account, authenticator, dns provider credentiels, server LE.
cat /etc/letsencrypt/renewal/baptiste-dauphin.com.conf
# renew_before_expiry = 30 days
version = 0.31.0
archive_dir = /etc/letsencrypt/archive/baptiste-dauphin.com
cert = /etc/letsencrypt/live/baptiste-dauphin.com/cert.pem
privkey = /etc/letsencrypt/live/baptiste-dauphin.com/privkey.pem
chain = /etc/letsencrypt/live/baptiste-dauphin.com/chain.pem
fullchain = /etc/letsencrypt/live/baptiste-dauphin.com/fullchain.pem

# Options used in the renewal process
[renewalparams]
account = ***************************
authenticator = dns-ovh
dns_ovh_credentials = /root/ovh_credentials/certbot.ini
server = https://acme-v02.api.letsencrypt.org/directory
2
3
4
5
6
7
8
9
10
11
12
13
14
# Confirm that Certbot worked
To confirm that your site is set up properly, visit https://share.baptiste-dauphin.com/ in your browser and look for the lock icon in the URL bar.
If you want to check that you have the top-of-the-line installation, you can head to https://www.ssllabs.com/ssltest/
# Fail2Ban
# Commands
print jails
fail2ban-client status
get banned ip and other info about a specific jail
fail2ban-client status ssh
set banip triggers email send
fail2ban-client set ssh banip 10.10.10.10
unbanip
fail2ban-client set ssh unbanip 10.10.10.10
check a specific fail2ban chain
iptables -nvL f2b-sshd
fail2ban-client get dbpurgeage
fail2ban-client get dbfile
2
3
fail2ban will send mail using the MTA (mail transfer agent)
grep "mta =" /etc/fail2ban/jail.conf
mta = sendmail
2
# File locations
global default config
- /etc/fail2ban/jail.conf
will be override with this parameters Centralized Control file This is here we enable jails
- /etc/fail2ban/jail.local
# Htaccess
Htpasswd –c [password file name] [username]

htpasswd -c .htpasswd baptistedauphin@protonmail.com
2
3
# Keepass (xc)
Is exists tree implementation of keepass
- KeePass (2)
- KeePassX
- KeePassXC
# Why KeepassXC over other implement ?
from the FAQ of KeePassXCopen in new window
Question : Why KeePassXC instead of KeePass (2) ?
KeePass is a very proven and feature-rich password manager and there is nothing fundamentally wrong with it. However, it is written in C# and therefore requires Microsoft's .NET platform. On systems other than Windows, you can run KeePass using the Mono runtime libraries, but you won't get the native look and feel which you are used to. KeePassXC, on the other hand, is developed in C++ and runs natively on all platforms giving you the best-possible platform integration.
Question : Why KeePassXC instead of KeePassX?
KeePassX is an amazing password manager, but hasn't seen much active development for quite a while. Many good pull requests were never merged and the original project is missing some features which users can expect from a modern password manager. Hence, we decided to
fork KeePassXto continue its development and provide you with everything you love about KeePassX plus many new features and bugfixes.
Check the latest commitopen in new window date for KeePassX project
# Common usage
# Merge
merge database_1 database_2 into database_1
keepassxc-cli merge database_1 database_2
Successfully merged database_2 into database_1.
# AppArmor
official docopen in new window
aa-status
apparmor module is loaded.
2